Create the article and the code
If the article and the code already exist go directly to the Insert the code example in the WordPress article you are writing section.
Create the article on WordPress without code examples
The WordPress web site has already been created and is online. You have access to the dashboard and have the rights to write articles.
The main thing is that the code must be inserted when being in the Classic editor.
- In the dashboard, click on Post > All Post > Add new.
- Insert the title of your article.
- Then click on the 3 dots menu access on the top right.
- Select Code Editor.
- Start writing your article (only one sentence is enough).
- Click on the Exit Code Editor link at the top right side of the article or Go back to the right menu bar (step3) and select Visual Editor.
- Your are on the Classic Editor: Great! You can write your article and apply headings, color, bold…
- Do not forget to Save the Draft frequently.
Before talking about inserting code, let’s talk about writing or getting code.
Get the code example from your Editor
I am used to utilize VS Code. Try the same steps on your own code editor.
Remark: copying and pasting code from a blocNote does not run because the code will consider as text not as code!
- Open the file you want to extract code from in VS Code.
- Control that the code is correct and correctly formatted.
- Select and copy the extract your want to use in your article.
Okay, we have copied the code to be inserted. Now, we have to paste in the right place.
Insert the code example in the WordPress article your are writing
Until now, we have written the article and got the extract of code; the next step is to insert it in the correct place in the article.
- Go back to the article. If you had closed it, re-open it (dashboard > Posts > All posts > Select the post > Edit.
- Control you are in the Classic Editor (Exit the Code Editor).
- Go to exact place you want it to be displayed.
- Paste the extract of code.
- If all the steps have been respected, the code appears in the article in the Visual Editor. Yes! The code is inserted: done! Not exactly: we have to control how it is displayed…
- Do not forget to Save!
- Click on Preview. Click Right and Select Open in a New Tab is a good way to work!
- Oops! The code is there but… it does not look like code!
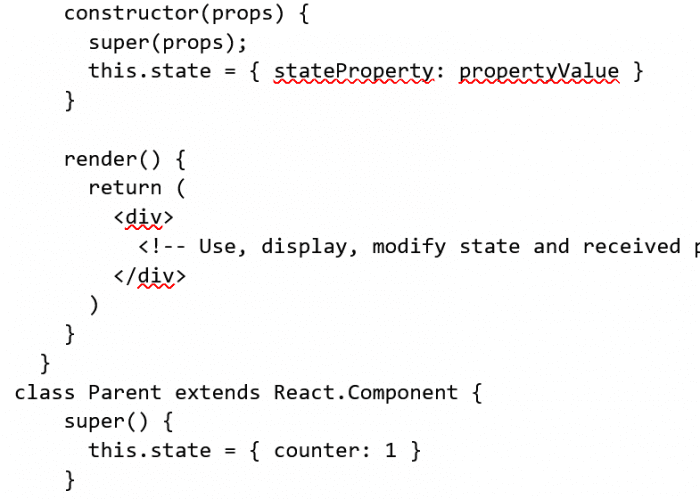
Code displayed in the Visual Editor
Maybe we could try to improve the final aspect…
Modify the aspect of the code examples in a WordPress article
There many solutions to improve the aspect of the code depending on:
- the attributed Role,
- the coding skills which are yours,
- whether the inserted code is a block of code or an inline code insertion.
We will start with inline code and then will study the different possibilities for blocks of code.
Modify the aspect of inline code example
Modifying the aspect of the just inserted inline code is very easy.
Apply the standard aspect
- Go to the Code Editor.
- Look for the inline inserted code.
- Just before it insert an HMTL <code> tag.
- Just after the inserted code, insert an HMTL </code> tag.
- Save (Save Draft, Update, Schedule depending on the article status).
- Exit the Code Editor.
- On the Visual Editor, the inserted code is displayed with a different font on a grey background.
- Done!
- Control on the preview. You should obtain the standard aspect. However it is possible to customize it a little:
- Go back to your article editor.
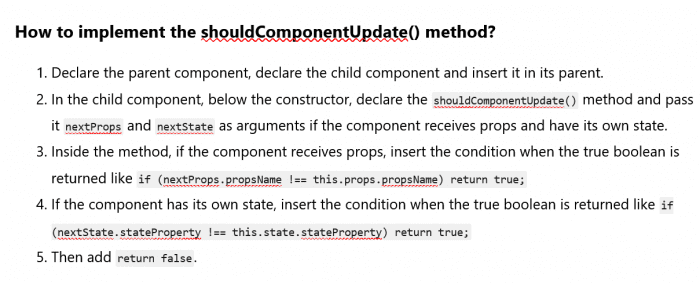
Inline Code in the Visual Editor after having added the HTML tags via the Code Editor
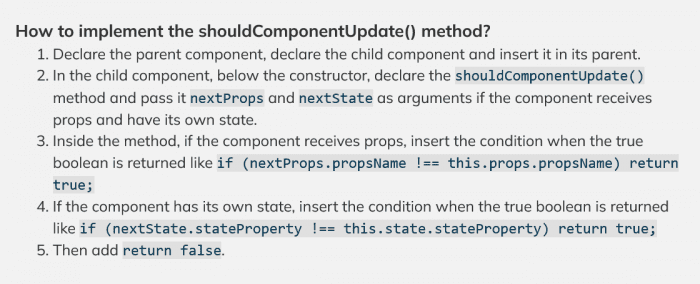
Same text with inline code in the published article
Customize the inline code aspect
- In the Classic Visual Editor, select the part of the code you want to customize.
- You can customize it in different ways like:
- apply another color,
- make it bold, or italic
- strike through.
- Save.
- Control the preview.
The inline code is inserted and customized; the mission has been accomplished. In case the result does not match exactly the expected aspect, modify it with the tools listed above.
If the inserted code is not an inline code but a block of code go to the next section!
Modify the aspect of a block of code example
Modifying the aspect of a block of code is a little bit more complex but not so much. The proposed solution will depend on various factors:
- If you are the person who is developing the custom theme you can create a specific class in the CSS custom theme file and apply this class to the code. When developing you can choose the font, the color, the background color, the margin, the padding…
- If you are not the blog developer but there is an aspect to respect and you know the corresponding class: apply this class to the code.
- If you are not the blog theme developer and there is no specific class to apply, you can create a custom CSS class in the theme customizer and apply this class to the code. Warning: you must know what you are doing and have coding skills!
Apply a given class
This explanation corresponds to the three first listed situations.
- You know the corresponding class to apply. Call it .code.
- Save the article.
- Switch to the Code Editor.
- Look for the inserted code. If everything is ok every line of code should be inserted between <div></div> HTML tags and all the block of code should be inserted between <div></div> HTML tags too!
- Go to the first <div> tag, the one enclosing all the block of code.
- Insert class=”code” in it.
- Save.
- Control the preview.
- The displayed code aspect should match the expected result.

Code displayed in the Code Editor – class .code added
If the result is not the expected one:
- If you are in the third situation and you have not coded this class yet, there will be no change in the preview! You must code in the customizer: go to the next section for more explanation.
- If you want to make some slight improvements which may be applied via the Visual Editor tools as for the inserted code go to the previous section.
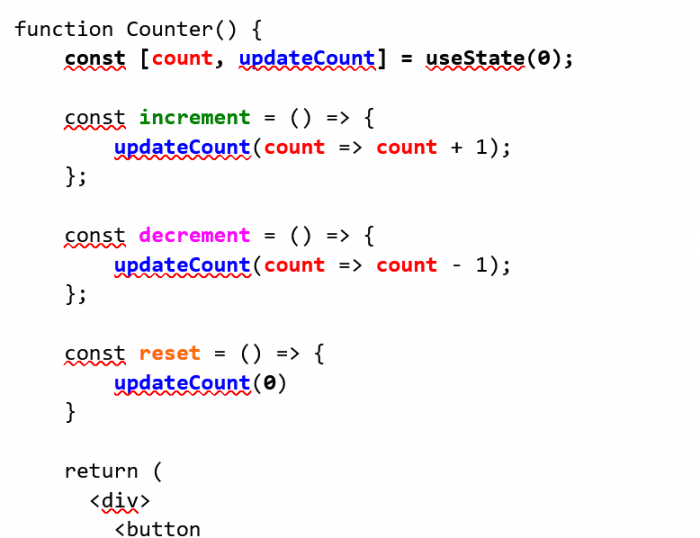
Code displayed in the Visual Editor – Modified with the Classic Editor tools
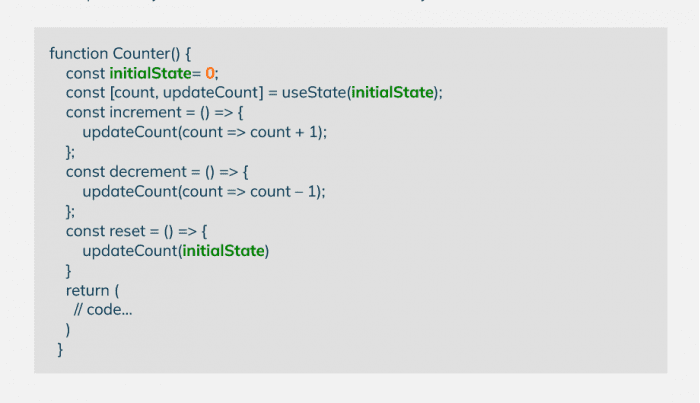
Example of code with CSS class applied and customized using the Classic Editor tools in a published article
- If you are the developer or you have respected the given class or you are in the third situation after having coded it via the customizer, refer to the given tricks at the end of the article!
Add a class via WordPress additional CSS in the customizer
- First, think about the aspect you want the code example block have, and class name you want to use. Remark: Do not use one already used in the theme!
- Go to the correct place to insert this additional CSS in the customizer : Dashboard > Appearance > Customize > Additional CSS.
- Write your code in the textarea.
- Control the result and improve your code if necessary.
- Add the class to the code as we have seen in the previous section.
Tricks to avoid or repair the possible formatting bugs
The code has not the expected aspect
- Go to the Code Editor and control that:
- the class attribute is correctly written,
- the class name is the good one and is correctly written,
- all the opening div tag have an ending tag.
- Correct the error.
- Save.
- control the preview.
The article text is formatted with code class!
When inserted the code a global <div> is created. All the text written after the code insertion will be inserted by WordPress just after the code and just before the ending div tag. As a result the .code class will be applied to the text.
To avoid the text being formatted as the code
- Write the next paragraph or insert a “blablabla” line after the place the code should be inserted in.
- Then insert the code.
To repair text formatting
- Go the Code Editor.
- Control where is the ending code </div> tag.
- If it is not just after the code ending, move it to the correct place.
- Save.
- And control the preview.
If the problem persists, control first the preview has been refreshed!
If there is no change after having refreshed it, go back to the Code Editor and control every opening <div> tag have its corresponding ending tag. Correct if needed.
In conclusion
Insert code examples in WordPress articles is very easy, isn’t it?
Do not hesitate to show code examples in your next articles.
In the next episode of this series “Insert elements when writing a WordPress article”, I will give some tricks to insert quotes with caption and cite in your WordPress articles.

